


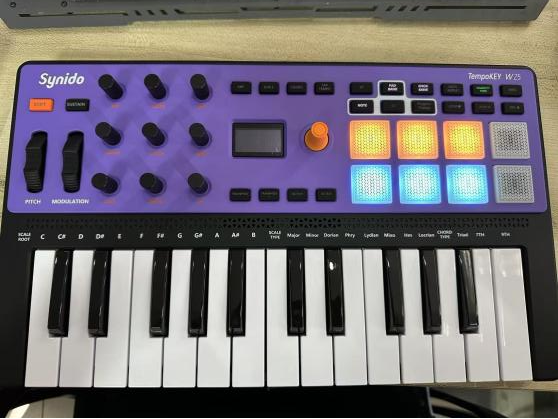
Synido TempoKEY W25 FAQs
Find the product using solutions here
If you have any other questions, you can contact us to get technical support help from our engineer
Contact email: cs@synido.com
Note: The below issue only applies to version V1.0.0. The subsequent V1.0.1 version has optimized this issue. If you accidentally enter upgrade mode, you can exit by toggling the switch to restart the device.
#1
1. Q: Why is there no sound when I hit the drum pads or keys?
A: The MIDI controller itself does not produce sound; it only sends MIDI signals. The accompanying software (control panel) comes with GM standard sounds, allowing you to perform without needing other DAW software. You can also connect it to a computer or mobile device with DAW software to generate sound. The sound comes from the computer or mobile device.
#2
2. Q: Can I connect the Synido TempoKEY W25 to speakers or an audio interface?
A: The MIDI controller does not produce sound by itself; the sound comes from the computer or mobile device. When connecting to speakers or an audio interface, you need to connect them to the computer or mobile device, which serves as the audio output.
#3
3. Q: Why is there no sound when I hit the pads or keys after opening the accompanying software?
Please check the following:
A:
- Ensure that the pad/key channels on the device and the accompanying software are set to match.
- Confirm that the device and accompanying software are successfully connected (you can check the "Connection Status" displayed in the software).
- Try restoring factory settings by pressing the TEP, TEMPO, NOTE, and CC keys.
- Restart the accompanying software and try again.
#4
4. Q: When I open the accompanying software, it prompts "Current device is in use" (Windows only)?
A: Check if any other DAW software is open; you need to exit that DAW or any other program occupying this MIDI device. Also, try unplugging and reconnecting the device.
#5
5. Q: When I open mobile or computer DAW software, the sound from the keys/pads is low?
A: Some mobile/computer DAW software includes MIDI protocols, which require you to turn the main knob clockwise to 127 each time you open the software. This main knob controls the volume of certain applications, so it needs to be set to maximum in order to achieve the desired sound level.
#6
6. Q: There is no response when connecting to some mobile phones/tablets?
A: First, check if your phone has an OTG switch; enable it before connecting the device. Remove the phone case if possible. Lastly, try connecting the OTG adapter both ways into the USB-C cable. If it still doesn’t work, it may be a compatibility issue, so try using another model of phone.
#7
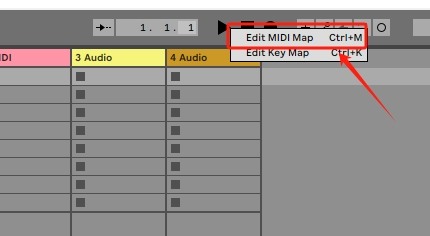
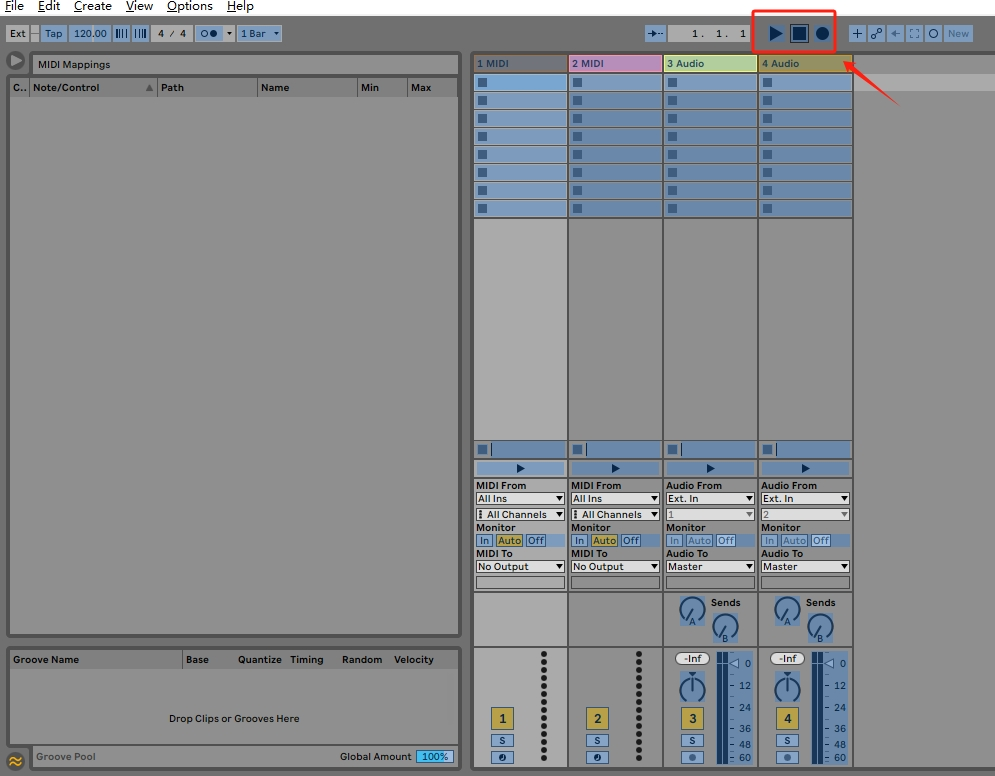
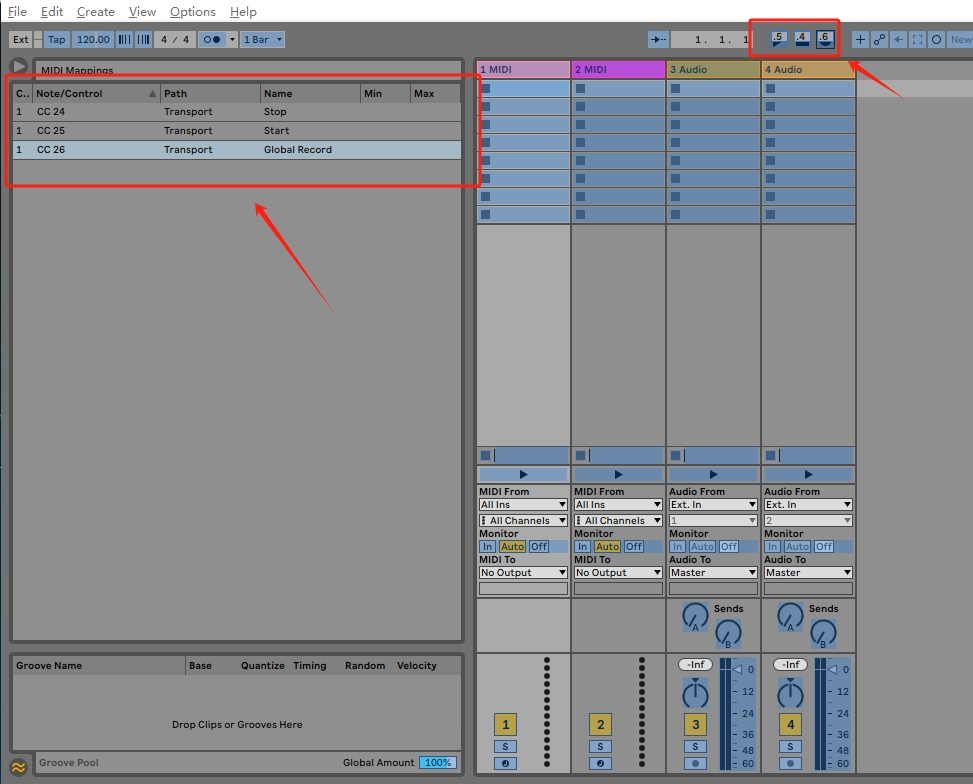
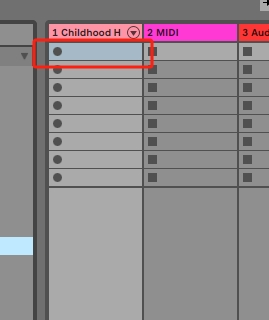
7. Q: How do I map the transport buttons in DAW software (using Ableton Live as an example)?
(1)In the Ableton Live window, right-click the transport button at the top and select "Edit MIDI Map" to enter the MIDI mapping interface.
(2)Click the "play" button in the DAW software, then press the corresponding play button on the device. If the icon shows 5, this indicates successful mapping. The left MIDI mapping table will display the corresponding data. Repeat for the pause and record buttons (Note: DAW software displays numbers: Play - 5, Pause - 4, Record - 6).
(3)Once mapped, you can control the DAW software using the device's transport buttons.
#8
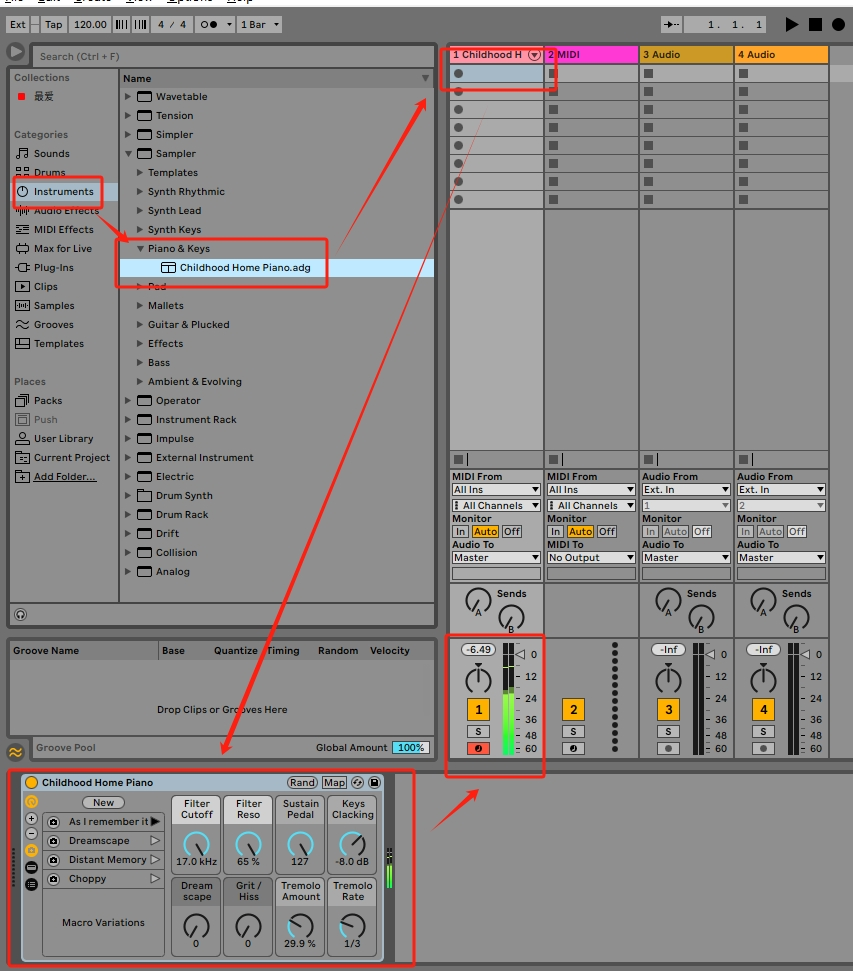
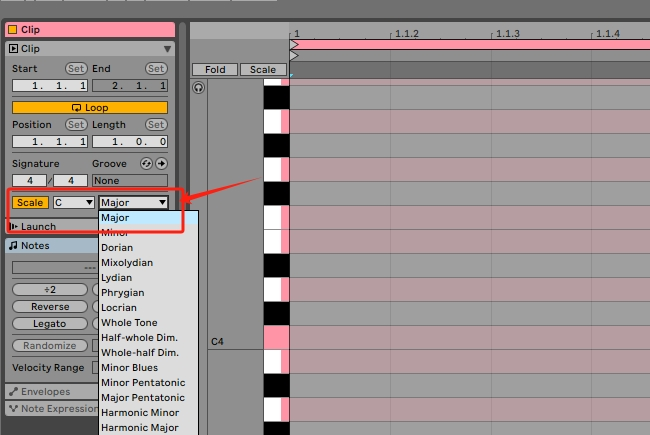
8. Q: How to use scale mode in DAW software (using Ableton Live as an example)?
A:
(1)Open Ableton Live and select your desired instrument from the left side, then drag it to the right MIDI track. The corresponding audio effects will load below. Hit the keys to check for sound.
(2)Double-click in the empty space of the MIDI track to enter the scale interface. Click the Scale button to enable the scale function, then select your desired "Root Note" and "Scale Mode" from the right. (Note: The device's root note and scale mode must match the settings in Ableton Live; refer to the manual for specific settings.)
(3)After setting up, you can use the scale mode in Ableton Live and view the scale information on the right.
#9
9. Q: When connecting to DAW software (like Ableton Live), the device occasionally experiences stuck keys and dropped notes when repeatedly pressing keys in smart chord mode?
A: This may be related to the performance configuration of certain computers. If this occurs, the user may need to try a different computer.
#10
10. Q: I cannot connect the SYNIDO TempoKEY W25 to DAW software on my phone via wireless Bluetooth, such as Koala Sampler, Cubasis LE 3, FL Studio Mobile.
A: Mobile DAW software typically does not include BLE Bluetooth connection options and requires third-party software for connection.
- iOS Users: Connect the SYNIDO TempoKEY W25 via Bluetooth to the "GarageBand" app. Check if there’s sound when hitting the pads. After confirming, run GarageBand in the background (do not close it) and then open your desired DAW software.
- Android Users: Download and install the "MIDI BLE Connect" app on your phone. Connect the SYNIDO TempoKEY W25 via Bluetooth to MIDI BLE Connect, keep it running in the background (do not close it), and then open your desired DAW software.
- GarageBand
- MIDI BLE Connect

#11
11. Q: I connected the SYNIDO TempoKEY W25 to my computer via wireless BLE Bluetooth, and although I enabled MIDI Clock SYNC on both Ableton Live and the SYNIDO TempoKEY W25, it is not functioning, and the BPM continues to run at the speed set on the W25.
A: The MIDI Clock signal cannot be transmitted via BLE Bluetooth. To use tempo synchronization, please connect via a wired USB connection.
#12
12. Q: I connected the SYNIDO TempoKEY W25 to my synthesizer, with the W25 as the output and the synthesizer as the input. The connections are fine, and I enabled MIDI Clock SYNC, but the synthesizer does not follow the BPM tempo set on the W25.
A: The SYNIDO TempoKEY W25 can only receive MIDI Clock signals as a slave device; it cannot send MIDI Clock signals as a master device. When using MIDI Clock SYNC, please set the W25 as the input device.
#13
13. Q: How do I use the W25's endless knob to adjust absolute (Abs) and relative (Rel) values?
A: You can modify the absolute value (Absolute Value) and relative value (Relative Value) through the device or accompanying software. Adjust according to your needs:
- 1. Device Settings: Enter the editing interface by pressing the main knob + endless knob to adjust Absolute Value or Relative Value.
- 2. Accompanying Software: Adjust Absolute Value or Relative Value using the angle adjustment on the right side of the endless knob.
- 3. Tips: Relative Value has three modes: Rel 1 - Rel 3. Choose based on the DAW software or hardware in use.
The MIDI relative value encoder is a hardware component (typically a knob) used to control music device parameters and its implementation in the MIDI protocol. Its core feature is to report changes (increments or decrements) rather than absolute positions. For mapping the relative value encoder, using Ableton Live as an example, set the knob to relative value mode Rel 1 - 3 (Note: Ableton Live does not support Rel 3 mode, only Rel 1 and Rel 2). After selecting the encoder knob to map, slowly rotate it counterclockwise, and Ableton Live will automatically recognize the mapping.
#14
14. Q: How to use the SYNC function after connecting to a synthesizer (using YAMAHA reface DX as an example)?
A: The device's MIDI IN port supports SYNC functionality. You need to connect the synthesizer's MIDI interface to the device's MIDI IN port. Open LOOPERA and REC, and ensure that the SYNC and ARP functions on the device are activated to enable SYNC synchronization.
#15
15. Q: Besides the indicator light, where else can I check the charging status?
A: Yes, the battery icon in the upper right corner of the main screen indicates the current battery level. When powered on or after 20 seconds of inactivity, it will display the battery level. During charging, it shows a charging icon, with a red light during charging and a green light when fully charged.
#16
16. Q: How can I check the remaining battery life, charging duration, and usage time?
A:
1. Check the upper right corner of the main screen; three bars indicate full charge. The battery icon will flash when the charge is low.
2. The normal charging time is approximately three and a half to four hours, and usage time typically ranges from five to six and a half hours, depending on usage habits.
#17
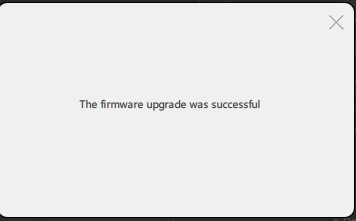
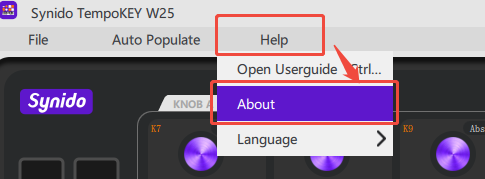
17. Q: When the device enters forced upgrade mode, it does not respond to power on/off. How can I make the device usable again?
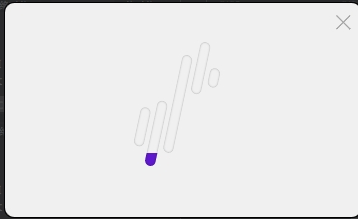
A: You may have accidentally triggered forced upgrade mode (forced upgrade: long-press PAD4 + PAD8, then toggle the switch). The device's status will appear as shown in the image below:
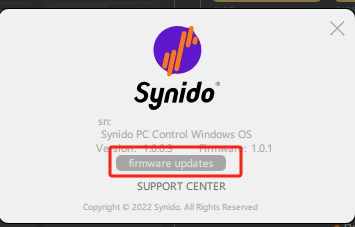
(1)Open the accompanying software "Synido TempoKEY W25". In the upper menu, select Help - About, and in the pop-up window, choose "Firmware Upgrade" to initiate the firmware upgrade.
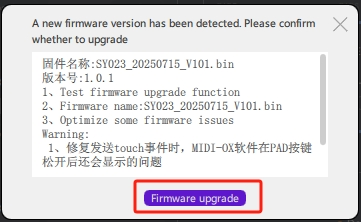
(2)The device will enter firmware upgrade mode, displaying a progress bar (Note: Do not operate the device or accompanying software during this process to avoid firmware upgrade failure).
(3)Wait about 45 seconds; it will automatically pop up "Firmware Upgrade Successful," and the device will start normally, indicating a successful firmware upgrade. (Note: If "Firmware Upgrade Failed" appears after one minute, it indicates a failure due to an interruption or error. Please return to step one and try again.)
0
1.1
1.2
1.3
3